
這是歷史版本頁面 — 看 Krita 最新版本
不想月付繪圖軟體?Krita 能取代 Photoshop 嗎
 Krita 4.3.0 (32-bit)
資料更新 2020-06-18
閱讀約 6 分鐘
你剛開始接觸數位繪圖,或是想從盜版轉正,打開 Photoshop 的訂閱頁面看到每月費用,再看看自己的畫稿頻率,怎麼算都不划算。你只是想好好畫圖、有筆刷、有圖層、能存 PSD 給別人,但免費軟體不是功能太陽春,就是介面陌生到不知道從哪裡下手。你需要的是一套真正以「畫畫」為核心、不是附帶功能的工具。
一般人遇到這個狀況,第一個念頭是找破解版 Photoshop,但更新麻煩、資安風險高,而且功能過剩——你根本用不到那麼多修圖功能。另一條路是免費線上繪圖網站,但畫到一半網路不穩、圖層一多就卡,作品存哪裡都不安心。這類工具的切入點是:把專業繪圖需要的核心功能——筆刷、圖層、色彩管理——做到完整,而且不跟你收錢,讓你能把心力放在畫面上,而不是放在軟體本身。
01Krita 這套軟體到底能拿來畫什麼?
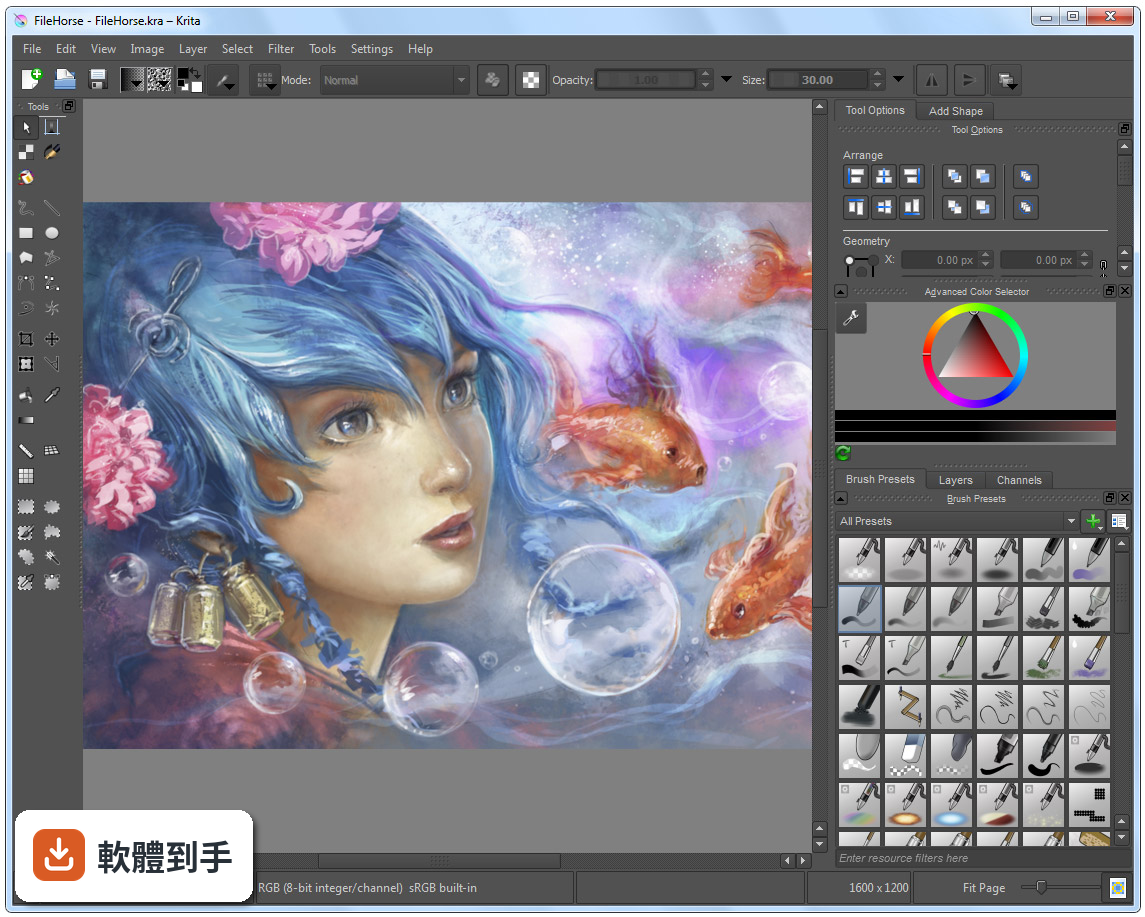
它定位是數位繪畫與插畫軟體,涵蓋概念設計、插圖、漫畫到 2D 逐格動畫。內建多種筆刷引擎,包含像素、混色、紋理、剖面線與圖案等,也有向量圖層、遮罩、調整圖層,以及時間軸和洋蔥皮功能。簡單說,從草稿、完稿到輸出成 PNG、JPEG 或 PSD,都能在同一套軟體裡完成。
02它的筆刷跟 Photoshop 比起來會不會差很多?
筆刷數量與自訂深度是它的強項,支援動態筆刷引擎,例如混色與紋理,也提供筆刷編輯器讓你調整參數。官方資料沒有直接跟 Photoshop 做比較,但以繪圖用途來說,筆刷系統的完整度足以應付多數插畫需求。如果你依賴的是 Photoshop 特有的修圖或濾鏡功能,那就不是同一條路線。
03我習慣用圖層畫圖,它的圖層管理夠用嗎?
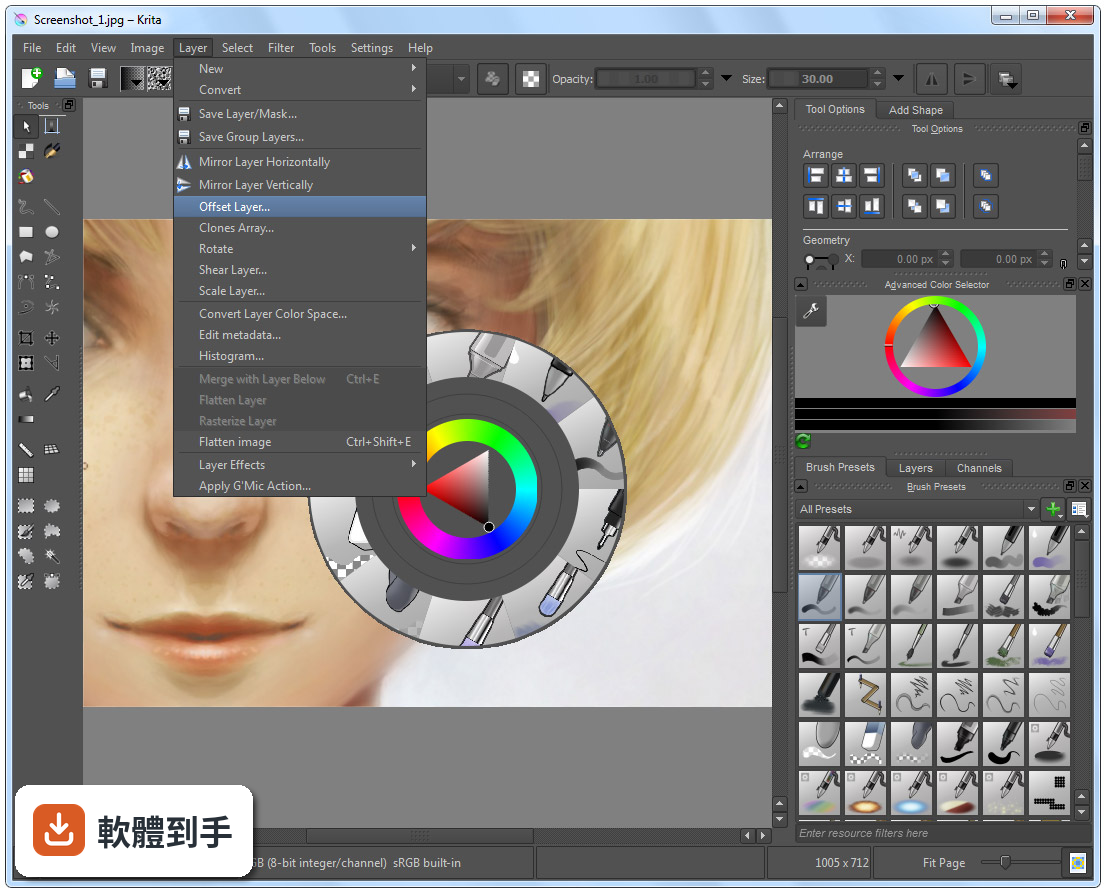
支援向量與點陣圖層,並提供群組圖層、遮罩與調整圖層,這些都是繪圖軟體的基本盤。圖層面板可以顯示混合模式與不透明度細節,也能一次選取多個圖層同時變形。以畫圖流程來說,該有的都有,非破壞性編輯也能做到。
04除了靜態圖,它能不能做動畫?
可以,內建時間軸與洋蔥皮功能,適合做 2D 逐格動畫。官方資料提到,近期的版本強化了影音同步與影片匯出,整合了 FFmpeg,多數使用者不需要另外設定就能匯出影片。不過這套動畫功能是「逐格」取向,不是做骨骼綁定或補間動畫的那種工具。
05它可以開 Photoshop 的 .psd 檔嗎?
可以開啟與儲存 .psd 檔案,但官方有提醒,某些複雜的圖層或特效可能無法完美轉換。如果你需要頻繁跟使用 Photoshop 的人交換檔案,建議先測試幾個含特效或調整圖層的檔案,確認轉換結果符合需求再當作正式流程。
06我是完全沒畫過圖的新手,這套適合我嗎?
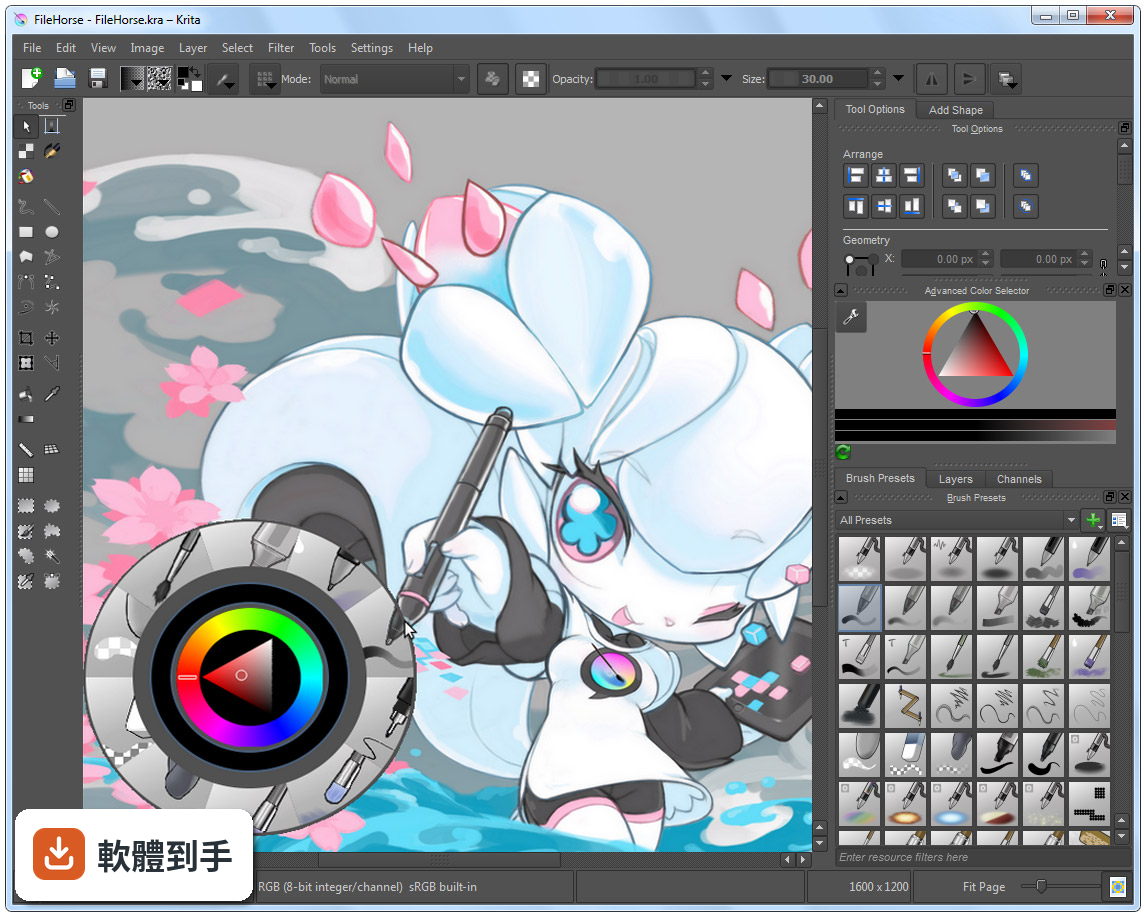
介面可以自訂,也有彈出式色盤與筆刷預設,降低上手門檻。但要注意,它的介面語言只有英文,對不習慣英文介面的人來說,初期找功能會比較吃力。官方有提供資源區可以下載額外筆刷與外掛,但那些說明也是英文。如果你願意花時間熟悉,它是可以從零開始學的。
07專業接案的畫家用它會不會不夠用?
它具備 ICC 色彩管理、Gamut Mask 與色輪等專業色彩工具,也支援 CMYK 與 PSD 相容性改善,官方定位就是給藝術家、插畫家與概念設計師使用。不過,評分人數僅 201 人,相較於 Photoshop 的 9575 人,代表使用者的回饋樣本少很多,實際遇到問題時能參考的社群經驗也相對有限。
08我主要用平板畫圖,這套軟體在平板上好用嗎?
官方資料說它支援 Windows、macOS、Linux 與 Android 平板,也支援繪圖筆。但要注意,Android 版本的功能可能與電腦版有差異,例如影片匯出功能在 Android 上就沒有整合 FFmpeg。如果你主力是 Android 平板,建議先確認你需要的功能在該平台上是否完整。
09跟 ArtRage 或 Paint.NET 比起來,我該怎麼選?
這幾套的定位不同。ArtRage 模擬傳統媒材手感,Paint.NET 偏向影像編輯,而 Krita 是完整的繪圖與插畫工具,功能範圍更廣。評分方面,ArtRage 只有 33 人評分,Paint.NET 有 316 人,Krita 是 201 人,樣本都不算大。選擇的關鍵在於你主要畫什麼——如果只是簡單塗鴉,輕量軟體就夠;如果要完整繪圖流程,Krita 的功能面更齊全。
10它的介面只有英文,會不會很難上手?
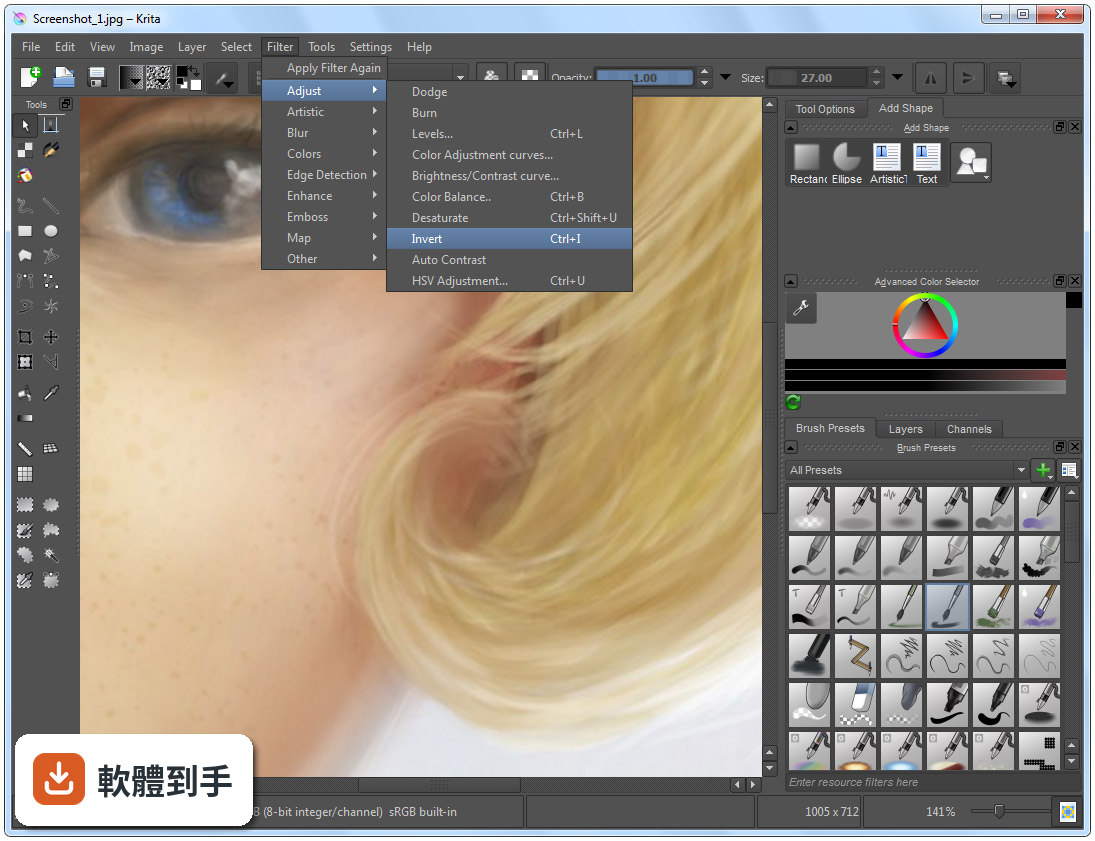
確實只有英文介面,這是實際的門檻。不過介面本身可以自訂,面板能拖曳、停放或隱藏,也有快捷鍵可以加速操作。如果你英文閱讀沒問題,影響不大;如果看到英文就頭痛,可能要考慮其他有中文介面的軟體,或是花時間查詢常用的功能名稱。
11它跟 Photoshop 可以完全互相替代嗎?
不行。它是繪圖與插畫取向的軟體,Photoshop 是全面的影像編輯工具,兩者的重疊範圍在繪圖與 PSD 相容性,但 Photoshop 的修圖、合成、濾鏡生態系是 Krita 沒有的。如果你只是要畫圖、交稿,Krita 有機會替代;如果你的工作流程包含大量影像處理,那就得兩套並用或繼續用 Photoshop。
12這套軟體更新頻繁嗎?會不會用一用就沒人維護?
根據版本紀錄,近 12 個月更新 9 次,近 24 個月更新 14 次,屬於持續維護中的專案,而且它是開源軟體,由 KDE 社群開發。不過,開源專案的開發節奏與商業軟體不同,功能演進方向由社群決定,不會有「保證某個功能一定在下一版出現」的承諾。以目前的更新頻率來看,短期內不用擔心被放棄。
下載與官方連結
krita-x86-4.3.0-setup.exe · 連結指向軟體原廠
版本紀錄
- 2026-10-08 Krita 5.3.4.1 157.81 MB
- 2026-09-17 Krita 5.3.4 157.88 MB
- 2026-07-30 Krita 5.3.3 157.66 MB
再看 5 筆
- 2026-06-03 Krita 5.3.2.1 156.49 MB
- 2026-05-28 Krita 5.3.2 154.07 MB
- 2026-03-31 Krita 5.3.1 156.64 MB
- 2026-03-25 Krita 5.3.0 156.64 MB
- 2026-02-28 Krita 5.2.16 147.85 MB
這一版改了什麼
What's new in this version:
Animations:
- New feature: The “Render Animation” dialog has a new option for exporting only the unique frames of an animation
- New feature: We’ve made new hotkey bind-able actions for selecting the previous/next sibling layer, for working within a single group of layers
- Fix: General animation caching improvements should lead to smoother and more consistent playback and scrubbing
- Fix: Hidden layers can now be properly edited and scrubbed in active isolation mode
- Fix: Timeline now correctly highlights the current frame when loading a new document
- Fix: Onion skins no longer become misaligned after cropping
- Fix: Presence of transform masks on the layer tree no longer glitch animation playback
- Fix: The “Render Animation” dialog’s image settings are now independent and no longer conflict with the image “Export” dialog’s settings
- Fix: The “Render Animation” dialog now correctly synchronizes HDR settings between the video and image sequence options
- Fix: Added small headers to multiple animation context menus to mitigate accidental selections
- Fix: The error message that’s shown when Krita can’t find FFMPEG now provides helpful information and a link to the official documentation
- Change: The “Isolate Layer” feature is now called “Isolate Active Layer” to better reflect how it works
Resources:
- Ramon Miranda created a new set of watercolor effect brush presets
- Bundles now properly handle timezones and show dates in the user’s preferred format
- There are a couple of new patterns by David Gowers that are good for usage with the new Palettize filter
Filters:
Gradient Map Color Mode Option:
- For the pixelart afficionado, there are two filter changes this release, both implemented by Carl Olsson. The first is the Color Mode in the Gradient Map filter. This allows setting the intermediate colors to use a dithering pattern or to restrict the colors to the nearest stop color.
Palettize Filter:
- The second feature Carl Olsson created is the new Palettize filter which works similar to the Gradient Map filter, but uses a palette to determine the colors. The Palettize filter also supports dithering:
High Pass Filter:
- The high pass filter, contributed by Miguel Lopez is, among other things, good for making images sharper. It is best applied as a filter layer set to overlay. This filter is especially useful as a final step for images uploaded to social media; the extra sharpness offsets the terrible scaling algorithms used by image hosting sites that make images blurry.
Other Filter Improvements:
- Memory leaks in the gradient map filter were fixed
- The edge detection and height to normal map filters no longer show staircase-like artifacts
- All convolution filters (like sharpen, blur) now work correctly on images with an opaque background
- The HSV filter now works more correctly on grayscale images
- The blur filter now calculates the aspect ratio correctly
- The motion blur filter now produces fewer artifacts
Layers:
- The performance of layer styles has been improved
- The separate channels function works again
- The split image dialog now supports splitting along guides dragged out of the rulers and has a nice preview as well
- Clone layers now perform much better and are much more stable
- Dialog to change the source of clone layers: another contribution by Tusooa, you can now change the source of a clone layer, and have it point at a different layer. Clone layers act like an instance of the source layer, for use in a variety of interesting effects, but it was not until now that they could be pointed at a different source layer.
Python
- ManagedColor now can also be initialized with a QColor
- Added a setDocument method to the View class
- Actions creating in Python extensions are loaded before the menus and toolbars are constructed
Painting:
- RGBA brushes: Krita now allows setting the opacity and lightness on colored brush tips separately. This allows for a number of new posibilities, amongst which the ability to get a texture remniscent of oil or acrylic impasto.
- The pixel brush engine is about 20% faster
Multi-dimension export for GIH:
- The GIMP image hose format (gih) supports multiple dimensions, so one can have several rows of brushes that can be set to randomness horizontally, and maybe increment vertically. And now Krita’s exporter supports this too, thanks to the work by Ivan Yossi!
Window Handling:
- It’s now possible to take the central canvas area out of the window and put it in its own window: the detached canvas mode is handy when you, for instance, have a big and a small screen, you can then put the image on the big screen and all the tools and dockers on the small screen.
Color Handling:
- Rendering the Lab channels is now done correctly both in the channels docker and on the canvas, thanks to L.E. Segovia.
- The color chooser no longer loses contrast when adjusting the saturation of the the HSL slider, while changing the lightness compensates better for keeping the saturation correct.
- Krita now tries to recognize the broken ICC profiles that Photoshop installs and doesn’t try to load them.
- Palettes with more than 4096 columns are now loaded and shown correctly.
- The color selectors not only perform much better but are also more correct and easier to use thanks to Mattias Wein’s work
Snapshot docker:
- Part of Tusooa’s work rewriting Krita’s undo system, the snap shot docker allows you to save certain states of progress into this docker and toggle between them.
Tools:
- Some tools come with “actions” — like increasing/decreasing the brush tip size. These actions are now created before an image is loaded, so they can be put on the toolbar.
Magnetic Selection Tool:
- Kuntal Majumder’s GSoC for 2019, the Magnetic Selection Tool, makes a free hand selection, but with a twist: it tries to align the selection to the edges it can find inside the image, simplifying the process tremendously.
New Modes for the Gradient Tool:
- Spiral, Reverse Spiral and Bilinear mode have been added by Miguel Lopez
Fill Tool and Contiguous Selection Tool (“Magic Wand”):
- The Fill Tool and Contiguous Selection Tool (“magic wand”) have been extended: you can choose between All Layers, Current Layer and Color Labeled Layers to indicate what area the tool needs to fill or select. This is particularly useful with complex multi-layer line art.
Other:
- Creating selections is now much faster
- Krita now tries much, much harder to make sure a file really is saved correctly: we check the size, the date, open the file, check the contents right after saving
- A really nasty bug was fixed by Wolthera: selections that are entirely outside the image could be saved and on loading would make it seemingly impossible to paint
- Saurabh Kumar added an option to open an image as a file layer in an already loaded image
- There is a new option to save images to .kra with all layers trimmed to the image size. This is off by default; enable it if you tend to move things outside the image boundaries and don’t want to keep that image data around between sessions.