
這是歷史版本頁面 — 看 MSI Afterburner 最新版本
顯卡超頻怕弄壞?MSI Afterburner 能幫你什麼
 MSI Afterburner 4.6.0
資料更新 2019-03-07
閱讀約 5 分鐘
玩遊戲時畫面卡頓、幀數上不去,打開工作管理員看到顯示卡使用率一直衝高,溫度也跟著飆到八、九十度。你想調整顯示卡設定讓它跑得更順,但又怕亂調會把卡弄壞,於是開始找有沒有工具能安全地調整時脈、風扇轉速,順便監看溫度變化。
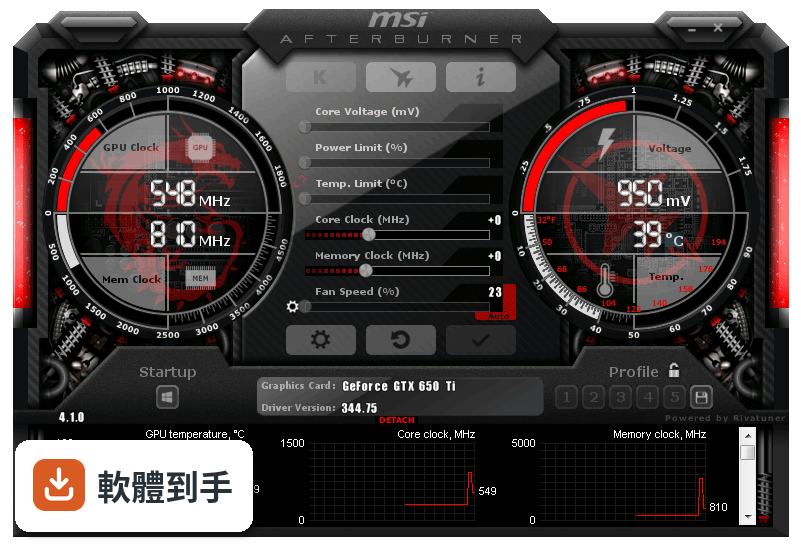
一般人遇到這種狀況,直覺是去顯示卡驅動程式裡找設定,但驅動程式內建的超頻選項通常很陽春,看不到即時數據,風扇曲線也不能細調。另一種做法是直接改 BIOS,風險高又麻煩。這類工具切入的點,是提供一個圖形化介面,讓你能拉滑桿調整核心時脈、記憶體時脈和電壓,同時即時顯示溫度、使用率,並把這些數據疊加在遊戲畫面上,邊玩邊看調整效果。
01MSI Afterburner 到底能拿來做什麼?
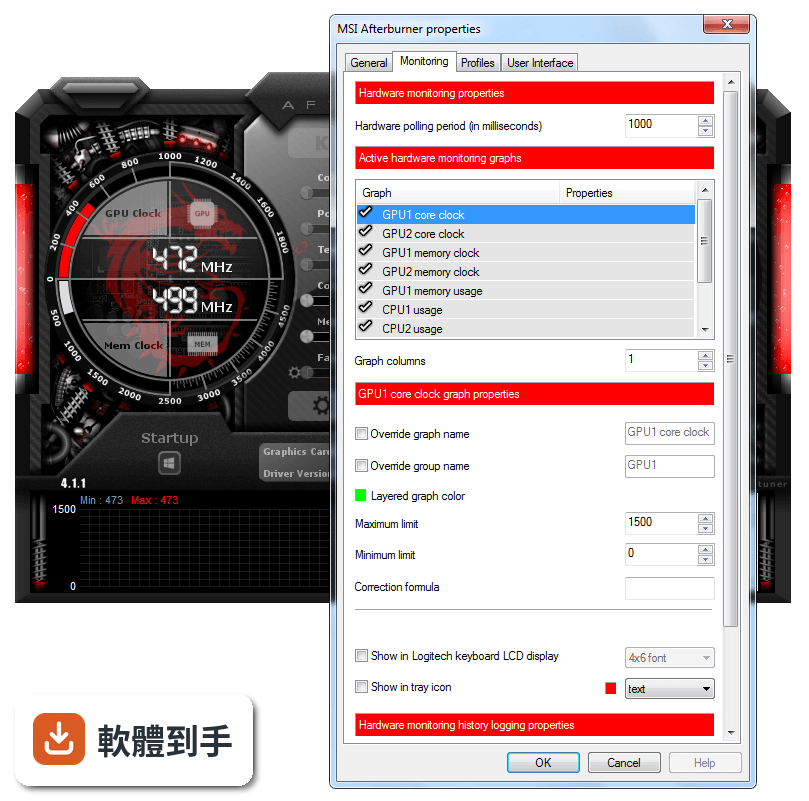
主要做三件事:超頻顯示卡、監控硬體狀態、錄製遊戲畫面。超頻部分可以調整核心時脈、記憶體時脈和電壓,也能自訂風扇轉速曲線。監控功能會即時顯示溫度、使用率、時脈等數據,可以顯示在遊戲畫面上或記錄成檔案。另外內建畫面擷取工具,能錄影或截圖。
02我完全沒超頻過,用這套軟體會不會很危險?
它有提供自動超頻功能,讓軟體自己掃描找出穩定的超頻設定,不需要手動慢慢試。手動調整時,只要照著一般超頻原則——每次小幅增加時脈、調整後跑測試觀察溫度和穩定性——風險是可控的。介面上也有重置按鈕,設定出問題可以一鍵恢復預設值。
03它只能用在 MSI 的顯示卡嗎?
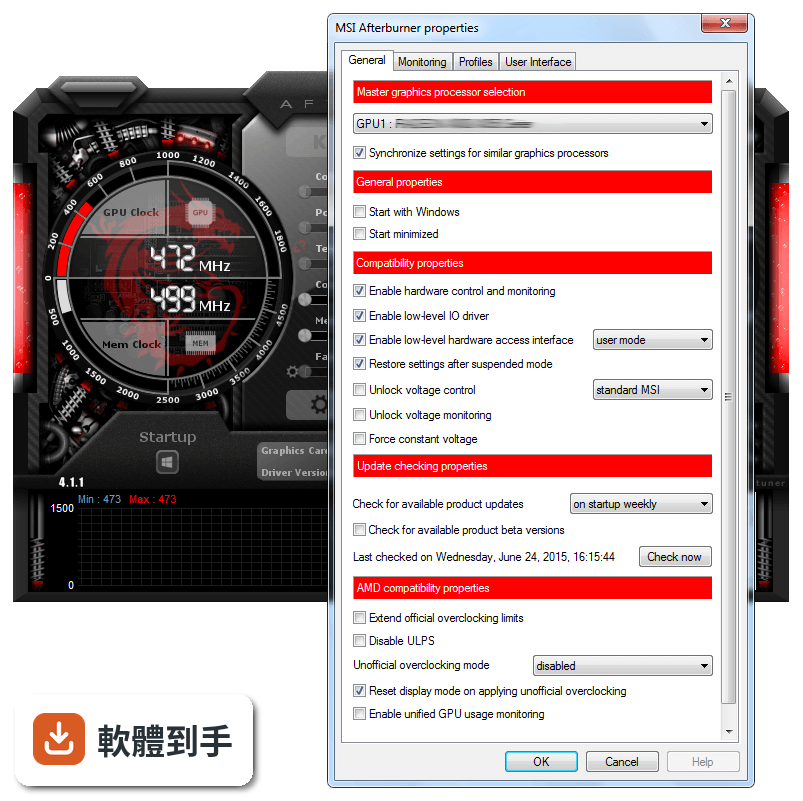
不是。雖然是 MSI 開發的,但它支援多家廠商的顯示卡,官方說明明確指出相容於不同製造商的 GPU。所以就算你的卡是華碩、技嘉或微星的,都能用這套軟體調整。不過實際支援程度還是要看你那張卡的型號,建議安裝後先確認軟體有沒有正確辨識你的顯示卡。
04遊戲中怎麼看目前的溫度和使用率?
用它的 On-Screen Display(OSD)功能。在設定裡啟用 OSD,選擇要在遊戲畫面角落顯示哪些數據,例如溫度、使用率、時脈、幀數等。進遊戲後這些資訊會疊加在畫面上,你就能即時看到調整設定後對效能的影響,不用跳回桌面切換視窗。
05風扇轉速可以自己控制嗎?
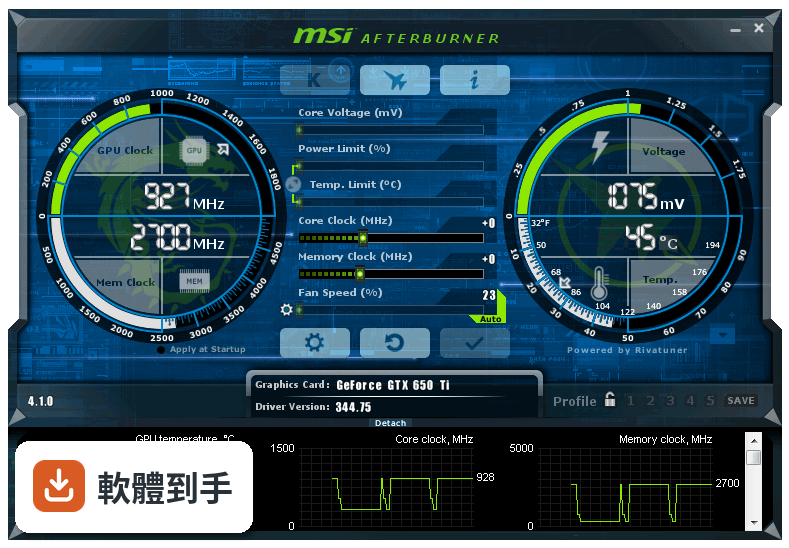
可以。它能自訂風扇轉速曲線,依照不同溫度設定對應的轉速百分比。例如溫度低於五十度時讓風扇轉慢一點減少噪音,超過八十度時全速運轉加強散熱。你可以存多組風扇設定檔,依不同遊戲或應用程式切換。
06這套軟體適合什麼樣的人用?
適合三種人:一是玩遊戲覺得幀數不夠、想透過超頻擠出額外效能的人;二是擔心顯示卡過熱、想自訂風扇曲線控制溫度和噪音的人;三是想錄下遊戲精彩片段或截圖的人。它也有內建錄影功能,支援 H.264 編碼和 WMV、AVI 格式,不用另外裝錄影軟體。
07筆電也能用嗎?
可以用,但有限制。官方說明指出筆電配備獨立顯示卡就能使用,不過因為筆電散熱空間有限,超頻幅度可能受限。如果你只是想在筆電上監看溫度、調整風扇轉速,這套軟體還是能做到。但如果是想大幅超頻提升效能,筆電的散熱條件可能撐不住。
08它能監控 CPU 的溫度嗎?
它主要專注在 GPU 監控,CPU 的部分只有有限的監控能力。如果你需要完整的 CPU 溫度、時脈、電壓數據,官方資料沒有詳細說明這方面的功能。建議另外搭配 CPU 監控工具,或直接看主機板廠商提供的軟體,會比依賴這套軟體更完整。
09介面只有英文,看不懂怎麼辦?
這套軟體的介面確實只有英文,沒有繁體中文選項。不過主要操作介面不複雜,核心時脈、記憶體時脈、電壓、風扇轉速這些都是國際通用的英文詞彙,看久就熟了。如果真的看不懂,網路上有很多中文教學文章和影片,照著步驟操作也能上手。
10它跟 GPU-Z 有什麼不同?我該裝哪個?
GPU-Z 主要功能是顯示顯示卡的詳細規格資訊,例如製程、記憶體類型、匯流排介面等,偏向查規格、看硬體資訊。MSI Afterburner 則偏重調整和監控,能超頻、調風扇、錄畫面。如果你只是想看顯卡規格,GPU-Z 就夠了;想調整效能或監看即時數據,選 MSI Afterburner。兩者不衝突,也可以都裝。
11這套軟體多久更新一次?還有人在維護嗎?
根據收錄的版本紀錄,它從 2010 年就持續更新到現在,最近一年內仍有釋出新版本。開發商 MSI 有持續在維護,不是放著不管的軟體。不過更新頻率不算高,一年大約一兩次,這對穩定運作的工具軟體來說是正常的。
12有沒有其他功能相近的軟體可以比較?
功能相近的軟體有 GPU-Z、HWiNFO、SpeedFan 和 Intel Extreme Tuning Utility。GPU-Z 偏規格查詢,HWiNFO 偏硬體資訊監控,SpeedFan 主要控制風扇轉速,Intel Extreme Tuning Utility 則針對 Intel CPU 超頻。以顯示卡超頻和遊戲內監控來說,MSI Afterburner 是功能最完整的,但如果你只需要其中某一項功能,其他軟體可能更輕量。
下載與官方連結
MSIAfterburnerSetup460.exe · 45.01 MB · 連結指向軟體原廠
版本紀錄
- 2025-10-10 MSI Afterburner 4.6.6 43.83 MB
- 2023-10-04 MSI Afterburner 4.6.5
- 2022-06-27 MSI Afterburner 4.6.4
再看 5 筆
- 2021-03-04 MSI Afterburner 4.6.3
- 2019-11-06 MSI Afterburner 4.6.2 48.37 MB
- 2019-10-19 MSI Afterburner 4.6.2 Beta 4 48.37 MB
- 2019-04-22 MSI Afterburner 4.6.1 45.5 MB
- 2019-04-10 MSI Afterburner 4.6.1 Beta 2 45.51 MB
這一版改了什麼
What's new in this version:
- Added Monolithic Power Systems MP2884A and MP2888A voltage controllers support
- Added core, memory, auxiliary PEXVDD and auxiliary 1V8 voltage control for custom design MSI RTX 2080Ti Lightning series graphics cards with MP2888A + MP2884A +uP1816 voltage regulators
- Added VRM and VRM2 temperature monitoring for custom design MSI RTX 2080Ti Lightning series graphics cards
- Added fan control support for AMD Adrenalin 2019 drivers family. Please take a note that AMD Adrenalin 2019 drivers adjust fan speed in PWM duty cycle mode but fan speed monitoring is provided in RPM only, which means that you cannot read back exact programmed fan speed in percents. Due to this limitation, MSI Afterburner is reporting fan speed as percent of maximum RPM instead of real fan duty cycle when default AMD auto fan control is in use. So monitored fan speed can slightly mismatch programmed fan speed curve if you're using default AMD automatic fan control.
- Added new MSI Gaming Z skin by Drerex Design
- Added framerate limiter compatibility settings group to “On-Screen Display” tab to the application properties. The settings include programmable hotkeys for globally disabling, enabling or toggling framerate limiting techniques of RivaTuner Statistics Server. The settings are intended to provide a way to dynamically enable or disable scanline sync technology based framarate limiting without altering application profiles, however you may use it to toggle traditional framerate limter as well
- Now CPU topology info (i.e. each logical CPU mapping to physical CPU package and core) is displayed in system info window
- Fixed kernel mode hardware access interface fix for AMD Vega GPUs. HBM temperature, GPU power and GPU voltage are no longer returning bogus values when kernel mode hardware access interface is enabled on AMD Vega series graphics cards
- Fixed low-level GPU usage monitoring for AMD Polaris GPU family. Software SMC registers offset is no longer hardcoded, offset detection algorithm is more future proof now. Please take a note that it will not fix zero GPU load issue when "Enable unified GPU usage monitoring" option is enabled. This option implementation is based on low-level DirectX performance counters, which require OS and display driver WDDM versions to match. Current AMD drivers are WDDM 2.5 so this performance counter is only working when you're under WDDM 2.5 OS (Windows October Update). If you're under older OS version, this performance counter won't work unless you downgrade to WDDM 2.4 driver (18.9.3 or older)
- Hardcoded voltage/frequency curve clock multiplier implementation has been replaced with heuristic multiplier detection in order to provide unified voltage/frequency curve control implementation for NVIDIA Pascal and newer NVIDIA GPU architectures
- Improved realtime voltage/frequency curve editor GUI scaling. Now GUI is scaled property when adjusting skin scaling with open voltage/frequency curve editor window
- Improved report window, fan curve editor window, monitoring window and voltage/frequency curve editor scaling for scaling ratios greater than 100%
- Now mandatory MSI Afterburner installation option is greyed out and cannot be unchecked during installation
- Now 64-bit Visual C++ 2008 ru
- Ntimes are also installed by MSI Afterburner installer. 64-bit runtimes are required for proper functionality of bundled MSI Overclocking Scanner application
- Multilanguage user interface library is DPI aware now. Main window skinned interface is no longer being scaled by OS and no longer looks blurred by default when greater than 100% DPI is selected. Now main skinned window interface can be manually zoomed with skin scaling slider in “User interface” tab, and the properties are automatically scaled by OS according to selected DPI
- Added new skin scaling mode for power users. New mode provides better scaling performance at the expense of some scaling image quality loss
- Skin scaling implementation is now asynchronous, so increasing skin scaling ratio doesn’t increase GUI update time and doesn’t decrease GUI response time
- Skin scaling slider range has been extended from 75%-150% to 75%-200%
- RivaTuner Statistics Server has been upgraded to v7.2.1
Added NVIDIA Turing GPU architecture support:
- Added voltage control for reference design NVIDIA GeForce RTX 20x0 series graphics cards
- Advanced GPU Boost control for NVIDIA GeForce RTX 20x0 series graphics cards. Extended voltage/frequency curve editor on GeForce RTX 20x0 family graphics cards allows you to tune additional piecewise power/frequency floor and temperature/frequency floor curves. Control points on those new curves allow you to control GPU Boost power and thermal throttling algorithms more precisely than traditional power limit and thermal limit sliders
- Hardware abstraction layer has been revamped to provide support for multiple independent fans per GPU due to introducing dual fan design on reference design NVIDIA GeForce RTX 20x0 series graphics cards and due to introducing native dual fan control in NVAPI. Both fans of NVIDIA GeForce RTX 20x0 can be monitored independently in hardware monitoring module now and can be controlled synchronically in manual mode
- Added NVIDIA Scanner technology support
Added AMD Vega 20 GPU architecture support:
- Added Overdrive 8 technology support for AMD RADEON VII series graphics cards
- Added extended thermal monitoring for RADEON VII series graphics cards. Extended thermal monitoring includes dualchannel GPU temperature monitoring (edge and junction temperatures), memory temperature monitoring and quadchannel VRM temperature monitoring (core, SOC and two memory VRM temperatures)
- GPU usage monitoring filtering algorithms are reenabled for AMD ADL based GPU usage monitoring implementation to minimize fluctuations in monitored GPU usage on AMD RADEON VII series graphics cards. Please take a note that filtering algorithms make GPU usage graph more inert and smooth, so you may disable them via configuration file if necessary
Improved hardware monitoring module:
- Added thermal offset for CPU temperature monitoring on AMD Ryzen 7 2700X processors
- Similar CPU temperatures are now cloned for all cores on AMD CPUs to provide more convenient and unified On-Screen Display layout between Intel and AMD CPUs
- “Pagefile usage” graph in hardware monitoring module has been renamed to “Commit charge”
- Added group operation notifier to the caption of active hardware monitoring graphs list in “Monitoring” tab in the application properties. The notifier is informing you that you can apply a setting to all or to multiple selected hardware monitoring graphs when you hold group operation key (i.e. or ) and hover mouse cursor over the setting that can be applied to multiple hardware monitoring graphs at once (e.g. “Show in On-Screen Display”)
- Added “Select by group” and “Select by type” commands to context menu of active hardware monitoring graphs list in “Monitoring” tab in the application properties. New commands allow selecting the graphs of exactly the same type (e.g. CPU1-CPU8 usage graphs on eight core CPU) or the graphs with the same OSD/LCD group name (for example, GPU clock, GPU power, GPU usage and the rest graphs with “GPU” group name). Such commands allow you to show similar items (e.g. all CPU usages) in On-Screen Display with a single click or rename a group for all child graphs in the single pass
- Multi group edit mode is automatically selected now for group name edit field when you enable "Override group name" option while holding key. You may still manually toggle this mode with + hotkey anytime when editing the group name
- On-Screen Display item type (i.e. text, graph or combination of both) is now displayed in “Properties” column of active hardware monitoring graphs list in “Monitoring” tab in the application properties
- Added programmable hotkey for clearing monitoring history
- Added “Apply” button to application properties window. Now you may iteratively customize monitoring module without closing the properties to see the result on each step. Please take a note that some properties (e.g. application language) cannot be applied until you completely close properties window by design of application
- Application properties dialog window is now displayed with topmost style when the properties are activated from detached monitoring window and “Always on top” mode is enabled for it
- Now “Mark minimum” and “Mark maximum” commands are available in the context menu of monitoring window even when a fragment of history is not selected. In this case the commands result in setting tracking marker in a global
- Extremum position. You may still use key and mouse cursor to select a fragment of history then use the context menu to set tracker marker in local extremum position
- Now you may press key in monitoring window to capture print friendly screenshot of hardware monitoring history graphs. The screenshot includes MSI Afterburner watermark by default, you may customize it by replacing overlay.png file located in .Graphics folder. This feature can be useful for hardware reviewers
- Now you may hold key then click unwanted graphs in hardware monitoring history viewer mode to hide them. This feature can be useful before capturing print friendly screenshot, if you want to exclude unnecessary graphs from it
Improved On-Screen Display layout editor:
- System reserved variable slots 250-255 are now displayed as system variables in the layout editor
- Added embedded graphs support. Embedded graphs can be displayed directly in the text in a separate column, it can be convenient for displaying per-core CPU usages
- Added embedded graph width adjustment variable to the “Graph” property node
- Added new “Graph placement” property node. You can use it to place each graph on top of text, on bottom or make it embedded in in text column
- Added new variables to “Separators” property node. Now you may define independent separators for the graphs located on top of text part, for the text part and for the graphs located on bottom of text part.
- Slightly altered interpretation of prolog and epilog separators. Please take a note that prolog separator is no longer automatically appended with new line symbol, so you must specify it manually when necessary and epilog separator is now displayed below the bottom group of graphs
- The list of hardware monitoring items in “Add item(s)” dialog window is alphabetically sorted now
- Added macroses for embedding any data from monitoring module into OSD text (e.g. prolog). You may use macroses to display anything available in the monitoring module, e.g. %CPU temperature%
- Improved On-Screen Display hypertext formatting performance due to more optimal macro replace strategy
- Revamped “modern web” layout. New layout is demonstrating new text formatting features including big custom framerate counter, custom embedded background and On-Screed Display header, custom benchmark and system time indicators and embedded CPU and GPU usage graphs
- On-Screen Display layouts are saved in monitoring profiles now
- Improved HwInfo plugin:
- Added UPS load, power, input voltage and charge level data sources to default plugin configuration
Improved voltage/frequency editor:
Voltage/frequency editor window is now available on AMD GPUs. On AMD platform it allows you to edit core frequencies and voltages independently per each P-State:
- Similar to NVIDIA GPUs, you may either adjust each point frequency or voltage independently with both mouse and keyboard ( / or + / + keys), hold key and drag single point to apply similar frequency or voltage offset to all P-states or hold key and drag single point to add the same offset to each P-State frequency or voltage offset
- You may press / keys to switch between frequency or voltage keyboard input focus for selected P-State
- Read only P-States are currently not tracked, which means that you can try to adjust the frequency and voltage for locked states but changes will be ignored when applying the curve
- P-States locking functionality is not implemented yet
- Now you may press / + keys when a point is selected to switch to the next / previous point. This feature can be useful if you’re fine-tuning the offsets from keyboard
- Now you may press key when a point is selected to type in desired frequency or voltage offset for it o Now you may press + keys when a point is selected to type in absolute desired frequency or voltage explicitly and let the editor to calculate the offset automatically
Added undo/redo support:
- Now voltage/frequency curve editor is saving up to 1024 last states of the curve during editing and allows you to undo/redo changes with + or + / ++ keys
- Undo history is discarded when you apply the curve
- Number of recorded undo/redo steps is displayed in square brackets in the editor window caption
- Slightly increased default voltage range for voltage/frequency curve. Now you may lock voltage to lower values if you’re using voltage/frequency editor to downvolt and reduce power consumption on your NVIDIA GPU. Power users may customize the range further, the voltage and frequency limits are fully adjustable via the configuration file
- Now you may press key in the editor window to reread the curve from hardware. This feature can be useful when adjusting the curve in changing thermal environment
- Voltage and frequency axes are dynamically scaled now, so the captions do not overlap when window is too small
- Improved hardware control shared memory interface. During the past years, external applications like MSI Remote Server were using this interface for tuning GPU hardware settings remotely from external applications. The improvements are intended to allow connecting external stress testing and automatic overclocking related applications to MSI Afterburner via this interface:
- Now voltage/frequency curve on NVIDIA Pascal and newer NVIDIA GPU architectures is accessible via hardware control shared memory interface
- New hardware control shared memory interface command allows MSI Afterburner to load hardware settings from external application without immediately applying new settings to GPU
- Added notification message, allowing external applications to notify MSI Afterburner about new command written to hardware control shared memory. Without the notification, MSI Afterburner is executing external commands on each hardware polling iteration like before. Please refer to SDK and MACMSharedMemorySample source code to see notification message usage example
- Added hardware identification info to GPU entries in hardware control shared memory. Hardware identification info allows external applications to reconcile own enumerated devices with logical GPUs enumerated by MSI Afterburner
- Now hardware control shared memory is refreshed on delayed fan speed readback events
New bundled MSI Overclocking Scanner application in now included in MSI Afterburner distributive:
- MSI Overclocking Scanner is currently supported on NVIDIA GTX 10x0 and NVIDIA RTX 20x0 series graphics cards under 64-bit operating systems only. On such systems you may activate the scanner with dedicated button from the main application window or directly from voltage/frequency curve editor window o MSI Overclocking Scanner is powered by NVIDIA Scanner technology, which is using proprietary algorithms to quickly and reliably test manually overclocked GPU stability or find the maximum stable GPU overclocking in automatic mode with a single click. The scanner is using embedded NVIDIA test load to stress GPU. The scanner provides you two functional modes:
- In test mode MSI Overclocking Scanner is stress-testing your manual GPU overclocking settings during approximately 5 minutes. The result is returned as GPU stability confidence level (0% - unstable, 100% - stable)
- In scan mode MSI Overclocking Scanner is stress-testing and slowly increasing clocks on voltage/frequency curve points and this way automatically detecting the maximum stable GPU overclocking. The result is returned as modified voltage/frequency curve and average GPU overclocking in MHz